

“Bake some bread, for instance…” goes the song Dělání. Today’s reality shows that we would rather “build a wall” than try making bread with our own hands. Most of us buy our bread from a local bakery or supermarket, for two reasons:
- Either we do not have time to bake bread, or
- we think that baking homemade bread is a lot of work and hard to get right.
I am telling you here that it is not rocket science at all, even though many bread recipes claim otherwise. Housewives in the past spent a disproportionate amount of time baking this gift from God, and it must be said that the result was a true delight. Even so, the method is actually simple and anyone can manage it, even a beginner. Don’t believe me? See for yourself with me in this article.
To begin, let us ask a few essential questions, which we will then try to answer. So:
- What flour should you use for traditional homemade bread?
- Is sourdough starter the basis of perfect bread, or can you bake it without one?
- How do you make a healthy, active bread starter?
- Do you need an oven for baking, or is a bread maker enough?
At the end, I will reveal 4 recipes for wonderful, fragrant homemade bread. Once you see how easy they are, you will never buy a basic supermarket loaf again. So let’s get to work!

💡 Tip: You will enjoy fitness cereal bread most with red lentils. Read our recipes for the best red lentils.
Table of contents
What is traditional homemade bread made of? Flour is the foundation!
The main ingredient of homemade bread is flour. The better the flour, the tastier and more fragrant the bread. Today’s “supermarket reality” has taught us not to care about what goes into our bread. We simply buy what looks good and is as cheap as possible. Add to this the fact that ordinary consumers cannot even access some key information about bread, and you have a vicious circle.
For the most important ingredient of good bread, flour, you should know at least the gluten content and the so-called falling number. This shows the quality of the grain (for example wheat) and determines the quality of the final product. Yes, the equation is very simple: the higher the falling number, the better the wheat and the better the bread.
🗣️ Food expert Petr Havel adds: The raw material for making quality flour should have a falling number of roughly 200 to 220 seconds. If the number is lower, flour made from the poorer-quality wheat has to be mixed with other batches of higher-quality flour.

💡 Tip: Read about why people avoid gluten even when they are not allergic.
How can you tell quality flour? It takes a sharp eye and at least a few years of experience!
If you have decided to start baking bread at home, it is worth learning to tell good flour from bad, that is, old flour made from inferior grain. How can you recognise good flour? Once again, the experts are here to help.
🗣️ Their advice: Take a little flour between your thumb and index finger and squeeze. If it holds its shape and does not “crumble” when you put it down, it is high-quality flour.
Let’s be honest, most industrially produced flour does exactly what the experts warn us about: it does not hold its shape when squeezed and falls apart. If you want to be sure you are buying quality flour, we recommend visiting a reputable bakery or buying flour made specifically for bread. It is more expensive, but certainly better than ordinary wheat flour at 13 CZK (about 0.6 USD).
Last but not least, use your taste buds as well and simply taste the flour. If:
- It is slightly bitter, it is probably old.
- It tastes slightly sour, it is probably made from damp, overheated grain.
- It is slightly sweet, it is most likely made from overripe ears of grain.
🎓 Did you know? High-quality rye flour should actually taste slightly sweet, which makes it much harder to tell good flour from bad. It takes years of experience and a trained palate to reliably tell the difference.
Live sourdough starter, a heavenly ingredient, starter and yeast are not the same thing!
For our ancestors, bread starter was something completely natural. Without starter there was no bread, and bread was a gift from God. First of all, it should be noted that bread starter and yeast are not the same thing. The block of yeast we buy in the supermarket is meant as an “accelerator” for busy people who do not have time to start and look after a traditional sourdough starter.
I deliberately highlighted the last two verbs, because that is exactly what our great-grandmothers did with their starter: first they started it, then they looked after it carefully. They made sure it rose in a warm place, gave it enough time and never rushed. Baking traditional homemade bread could easily take a whole day! But the housewives did not mind at all. They knew that patience pays off and that they would be rewarded with perfect bread.
Do you know the benefits of bread baked with a traditional sourdough starter? Well:
- It has a perfectly balanced sweet and sour taste,
- It is easy to digest, and
- It keeps much longer than bread baked with a block of yeast.
Starter vs yeast, or, don’t spend money on dead yeast!
An ordinary block of yeast in the shop is stored in a fridge so that it “lasts longer”. Nobody tells you that the yeast in it is very likely dead. Yeast needs warmth, and any sudden drop in temperature harms it. So if you are eyeing chilled (or, heaven forbid, frozen) yeast in the shop, you will only empty your wallet and waste hours at home trying to “revive” it.
So there is a simple answer to the question “How do you bake bread without yeast?”: make a sourdough starter! You do not need yeast at all. Sourdough bread is a nightmare for many women today because they see it as something unattainable, but the opposite is true. With a good starter, you can make not only bread but also baguettes, cakes, Czech Christmas plaited loaves (vánočky) and angel wings (boží milosti).
How do you make a good sourdough starter?
Making a starter is quite easy, but you need to remember that you want bread at least a day in advance, not on the day of baking. Believe it or not, all you need to make it is water and flour. Take extra care when choosing your flour, as I explained in the previous section. Also bear this in mind:
- For bread, rolls and baguettes (and other savoury baking), choose rye flour.
- For cakes, Christmas plaited loaves, angel wings (and other sweet baking), choose wheat or spelt flour.
🎓 Did you know? To make a starter, you need flour with a reasonable amount of gluten (the more, the better)! You cannot make a starter from corn, pea, buckwheat or rice flour.

Homemade bread starter
Making a homemade bread starter takes about 5 days. You can see the individual steps in this schedule:
- Mix flour with lukewarm water. Keep to a ratio of roughly 1:1, that is, 20 ml of water for 20 g of flour. Never pour cold or hot water onto the flour. It must be pleasantly lukewarm. Stir the mixture into a thin paste that should have roughly the consistency of pancake batter. Pour the smooth mixture into a preserving jar and cover it with cling film, securing it around the neck of the jar with a rubber band. Make a few holes in the film with a fork so that air can reach the mixture. Leave the mixture at room temperature for 24 hours, and the starter will begin to ferment.
- Repeat the steps in point 1. Add the same amount of flour and water to the rested mixture, stir thoroughly and cover with new film. Leave it to stand on the kitchen worktop for 24 hours. After a while, you will notice the first bubbles on the surface. The starter is beginning to form.
- Repeat the process from point 1. Keep a close eye on how fermentation is progressing. The starter is coming to life, and if you have done everything correctly, it will swell to up to twice its volume.
- After another 24 hours, check that the starter is “alive” by smelling it. If you notice a strong, sour but pleasant smell, everything is fine. If the smell is rather faint, it is time to feed the starter again (with the same amount of water and flour as in point 1), cover it with film and leave it to ferment until the next day.
- The starter is almost ready. Just add another teaspoon of water and flour, close it with an aluminium lid with holes and store it in the fridge.
🗣️ Experienced housewives advise: Don’t forget to look after your starter properly! Like any “living organism”, it needs care in the form of regular feeding. You can tell a neglected starter because it separates liquid and pushes it to the surface. It is best never to reach this stage and to feed the starter with two tablespoons of flour and water every 5 days. That way you can be sure it will never go hungry and “die”.
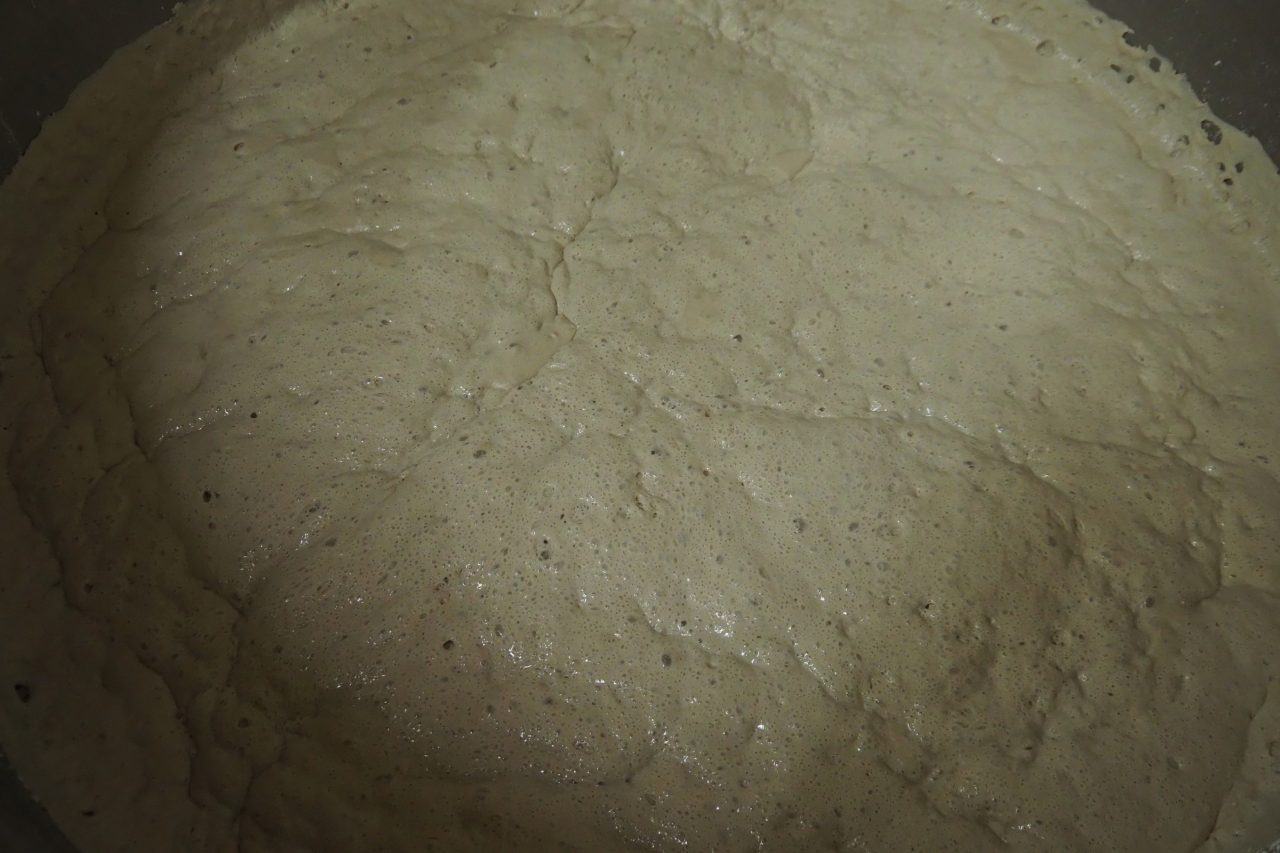
Yeast starter or sourdough? Be patient and you will enjoy it far more!
As I have already hinted, a yeast starter and sourdough are not one and the same! The key difference lies in their composition:
- Baker’s yeast contains a single species of yeast, namely Saccharomyces cerevisiae.
- Bread sourdough is made up of as many as a hundred microorganisms, i.e. yeasts and bacteria that occur naturally in cereal grains.
🎓 Fun fact: This is also why sourdough must be made from wholemeal flour with access to air. Without these two factors, the sourdough will not rise.
While the yeasts in baker’s yeast focus mainly on carbohydrates to speed up the rising of the dough, sourdough takes many times longer to rise, because the microorganisms break down and feed on various substances contained in cereal grains, producing carbon dioxide, which makes the dough light and airy. If you look at traditional and modern recipes for yeast-raised bread and pastries, you will see a huge difference.
In traditional recipes the main ingredient was sourdough and you will find no mention of sugar, whereas in modern ones, when making a yeast starter, you have to mix the yeast with sugar to “help it rise”. This applies even to savoury baked goods. Yet rising helped along by yeast is “unnatural”, and you will never get rid of the yeasty aftertaste in the bread. By contrast, sourdough is versatile, has no aftertaste and you can use it equally for bread rolls and sweet cakes.
How to bake homemade bread, is it better to bake in the oven or in a bread maker?
Traditional home cooks tend to prefer a preheated oven, while modern women swear by their bread makers. In my opinion, both appliances have their advantages.
Advantages of the oven:
- Better flavour,
- Emphasis on tradition (women who take the trouble to make sourdough would rather trust it to the oven than to a bread maker with their dough),
- Hand-shaping bread in various forms,
- Control throughout the entire baking process.
Advantages of a bread maker:
- Besides baking, it also kneads the dough, which is a huge advantage, especially with stiff yeast dough,
- You can add any ingredients to the dough and try out all sorts of combinations,
- Special bread makers can also make jams and yoghurt cultures, which you can enjoy with your freshly baked bread, for example.
Home cooks who hold traditional values swear by the oven, in which they bake bread either on a baking tray or in a special ceramic dish known as a Roman pot. They say that making the dough took them many hours, and after all that hard work they do not dare to entrust their “lovingly nurtured” dough to a bread maker. Modern women counter that a bread maker not only bakes the bread but also mixes and kneads the dough. On top of that, it helps them give free rein to their imagination, add more ingredients to the mix and experiment a little.
Personally, I would say both camps are right and it is up to each of us which appliance to choose. Both do an excellent job.
4 recipes for delicious, fragrant homemade bread. No shop-bought bread can match the taste!
Are you ready to find out how easy it is to make a delicious homemade loaf? Many people ask themselves “How do I bake bread?” so that it is crusty, tasty and stays fresh for a long time. I have found 4 unique recipes for you, which even a beginner can use to bake homemade bread.
💡 Tip: Bread goes well with recipes for a healthy and tasty dinner!
Recipe 1, old Czech sourdough bread
You can find out how to bake bread with a starter on any website devoted to baking. However, we will focus on our grandmothers’ classic recipe, namely sourdough bread, which goes perfectly with tasty vegetarian recipes.
To make traditional bread from a “levain”, you will need:
- 2 heaped tablespoons of bread sourdough, prepared according to the instructions above,
- 260 ml of lukewarm water,
- 450 g of rye flour,
- 2 teaspoons of salt,
- 1 teaspoon of caraway seeds.
Method
- Pour the lukewarm water into the levain and mix thoroughly. Do not stir too vigorously, so that the sourdough does not “break”.
- Sift the flour into the mixture and add the salt and caraway seeds.
- Knead with a wooden spoon or a mixer with special dough hooks. The dough is ready at the moment when it no longer sticks to the sides of the bowl and holds its shape nicely.
- Cover with a tea towel and leave to rise for about 2 hours, “punching down” the dough with your fist and turning it over every half hour.
- After 2 hours, transfer the dough to a floured board, punch it down and turn it over several times, then shape it into an oval and place it in a proofing basket. Cover with a clean tea towel or wrap in cling film.
- Leave the dough to rise either for 2 hours at room temperature or for 12 hours in the fridge.
- Prepare the “baking area”. Place one baking tray on the rack in the oven and put a second one at least two shelves higher. Heat the oven to 250 °C.
- Turn the dough out of the proofing basket onto baking paper, score it with a razor blade and place it on the lower tray. Quickly pour cold water into the upper tray and close the oven. This creates steam.
- Bake the bread first for 15 minutes at 250 °C, then reduce the temperature to 185 °C and bake for about another 35 minutes.
- During baking, you can spray the bread with water from a spray bottle for an even crispier crust, but it is not necessary.
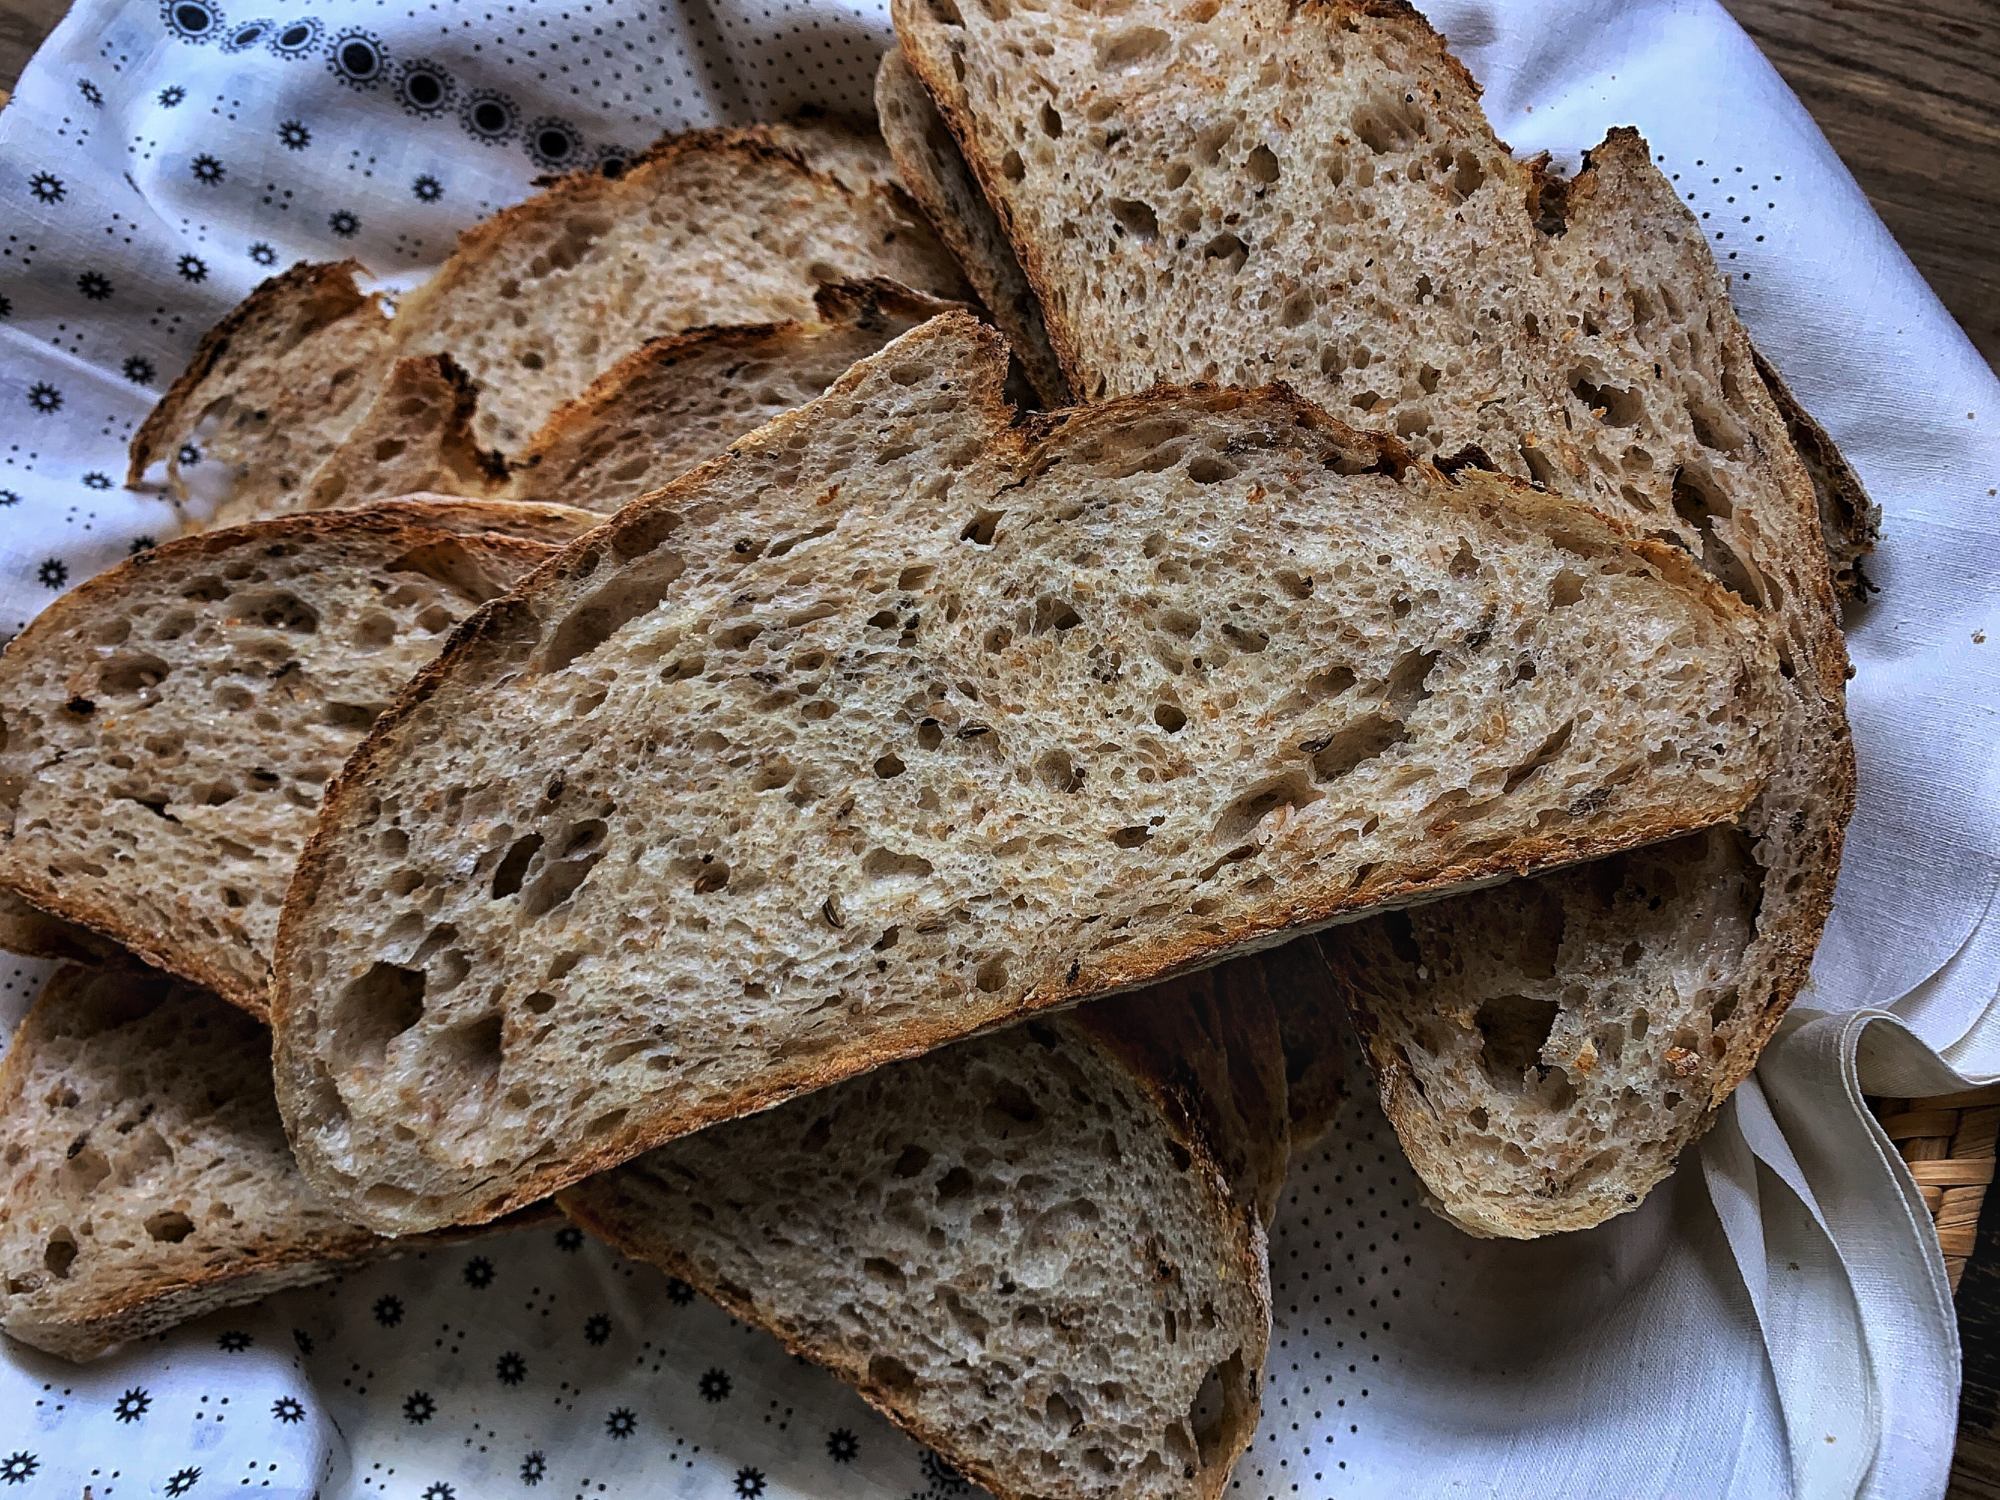
- Leave the baked sourdough bread to cool slowly on the tray so that it does not sink. Once cool, cut into slices.

Recipe 2, homemade garlic bread baked in the oven
In the Czech Republic we would call it “French baguette with garlic”, but abroad it is simply known as “garlic bread homemade”. For the French, it really is bread, and a national treasure at that.
You will need:
- 2 tablespoons of levain,
- 315 g of rye flour,
- 180 ml of lukewarm water,
- 2 teaspoons of salt,
- 3 to 4 cloves of garlic,
- Half a cup of clarified butter,
- A sprig of parsley.
Method
- Work the levain, flour and water into a soft dough and leave it to rise just as in the first recipe.
- Shape the risen dough into 3 baguettes, score them with a razor blade and leave to rise for 30 minutes on baking paper.
- Bake in the oven, first placing a dish of water inside to create steam, which softens the dough. Bake at 250 °C for 10 minutes, then bake until golden (about 20 minutes at 190 °C).
- Leave the hot baguettes to cool, then cut them in half and brush with melted butter mixed with crushed garlic. Sprinkle with parsley and return to the oven for 10 minutes.
- Serve hot.

💡 Tip: You can replace the garlic with finely chopped broccoli. Broccoli recipes are good for your health!
Recipe 3, homemade buttermilk bread made with yeast by reBarbora
This recipe is for busy people who simply do not have time to start and look after a sourdough. I completely understand. That block of yeast is meant for us, as it speeds everything up enormously.
To make buttermilk bread, you will need:
- 300 g of spelt flour,
- 200 g of wheat flour,
- 2 teaspoons of salt,
- 2 teaspoons of caraway seeds,
- A teaspoon of honey,
- A tablespoon of vinegar,
- A tablespoon of oil
For the yeast starter:
- A teaspoon of sugar,
- A teaspoon of flour,
- 1 block of yeast,
- 300 g of buttermilk.
Method
- Warm the buttermilk, crumble the block of yeast into it and add a teaspoon each of flour and sugar. Stir into a thin paste and leave it somewhere warm to rise.
- Sift the flour into a bowl and add the salt, caraway seeds, honey, vinegar and oil. Finally, pour in the risen starter and knead into a stiff dough with a mixing spoon. It should not stick to the board or the spoon. If you are not strong enough, use a food mixer with dough hooks.
- Put the finished dough in a proofing basket and leave it to rise for 60 minutes in a warm place, or for 12 hours in the fridge.
- Transfer to a baking tray and place in a slightly warmed oven, where it will rise for another 30 minutes.
- Heat the oven to 250 °C, after a few minutes reduce it to 220 °C and put in a dish of water. Immediately afterwards, put in the tray with the loaf.
- Bake for 15 minutes at 220 °C and 30 minutes at 180 °C. Baked bread sounds hollow when tapped.
- Slice once it has cooled in the oven.

💡 Tip: Good-quality buttermilk bread can occasionally replace meat without you losing a source of protein!
Recipe 4, sourdough beer bread
Did you know that you can easily replace yeast with dark beer? Brewer’s yeast is considered a miracle, and bread baked with it the greatest delicacy. It is time to give it a try!
To make beer bread, you will need:
- 400 g of rye flour,
- 300 g of wheat flour,
- 3 tablespoons of levain,
- 600 ml of dark beer,
- 20 ml of vinegar,
- 20 g of salt.
Method
- Pour the beer (it must be at room temperature) into the levain, mix thoroughly and add the flours.
- Work into a soft dough and leave it to rise following the method in the first recipe.
- Prepare the baking trays, again with one at the bottom on the rack in the oven and the other two to three shelves higher.
- Knock back the dough on a pastry board, shape it into an oval loaf and transfer it to baking paper. Score it with a razor blade and spritz it with water from a spray bottle.
- Move the bread onto the lower baking tray, pour water into the upper one and close the oven door.
- Bake for 3 minutes at the highest temperature, i.e. 250 °C. After 3 minutes, open the oven to let the excess steam escape, lower the temperature to 180 °C and bake for 35 to 40 minutes.
Leave the bread to cool together with the oven. Cut into slices.
💡 Tip: Want to start living healthily? Try a one-day fast that will flush toxins out of your body!
USD amounts are approximate, converted at the Czech National Bank rate of 21.75 CZK per USD on 9 October 2026.